

Mixed media drawing of Bembidion alaskense, copyright David R. Maddison, CC-BY-NC
I love the sculptural details of beetles, and their intricate structures and colors. I like to draw them, although admittedly I haven’t done it much over the past 35 years. I did the drawing above in 1981, which is a shockingly long time ago, while I was a grad student at the University of Alberta. I still draw on occasion (my most recent full-color, large drawing was in 2006). I’ve been asked multiple times what methods I use, and so here’s a brief description, with pictures showing the development of the drawing shown above.
The first step is creation of a pencil outline drawing on tracing paper. Once that is done, I use a soft (4B) pencil, and color on the back of the tracing paper, under the pencil lines. This will serve as a carbon paper for transferring the outline to the Arches hotpress watercolor paper. The tracing paper is placed on the watercolor paper, with the soft graphite layer facing the watercolor paper. With a very sharp, hard (6H) pencil, I draw over the outline with just enough force to transfer some of the graphite onto the watercolor paper. I then remove the tracing paper, and draw over the major lines with a thin black pen (these days I would use a Sakura Pigma pen, but back then I would have used a Rapidograph or similar pen). I erase any excess graphite. I then add a masking sheet around the open paper areas (to prevent accidental marks and dirt getting onto that part of the paper). Here’s the result:

Pencil sketch, outlined in ink, on 140 lb Arches hotpress watercolor paper
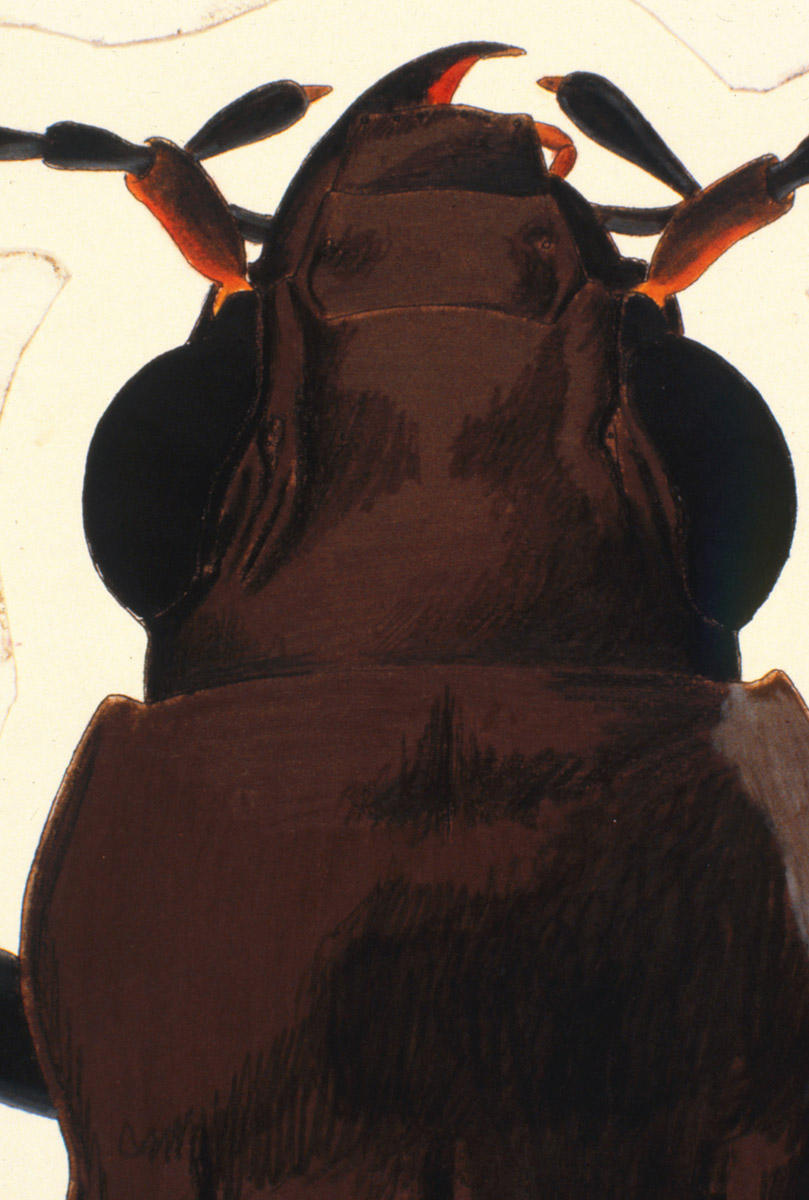
I typically then use a crude layer of watercolor to fill in the majority of the beetle, although for this Bembidion drawing I happened to use Pantone markers:

Quick layer of watercolor (or, in this case, Pantone marker , which I no longer recommend)
The advantage of that quick layer is that it allows one to put relatively light layers of colored pencils on top of it and still get a solid color (as the white fibers of the paper no longer will show through the colored pencil). The Pantone markers in this drawing were a very bad idea, not because Pantone markers are bad, but rather because some chemical in them interacted with the other layers, and the dyes in the Pantone markers leached through the layers and affected the final drawing’s colors. That’s why I’ve fully switched to watercolors for this base layer.
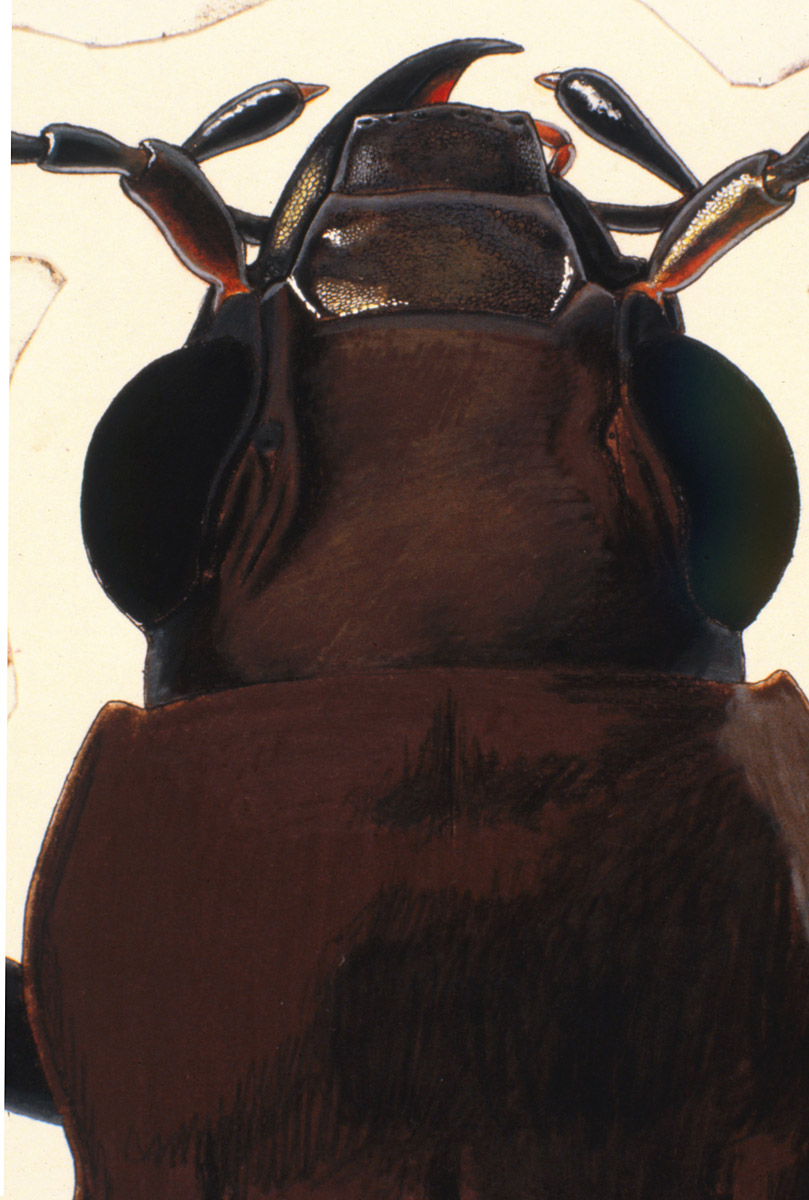
The next layer is a layer of colored pencil:

First layer of colored pencil
I tend to use Prismacolor pencils, but it depends upon the color. You will learn through time that each pencil has its own behavior, with some being very waxy, some hard, etc. and that a mix of brands can give you the best results. There are many high-quality colored pencil brands to choose from these days.
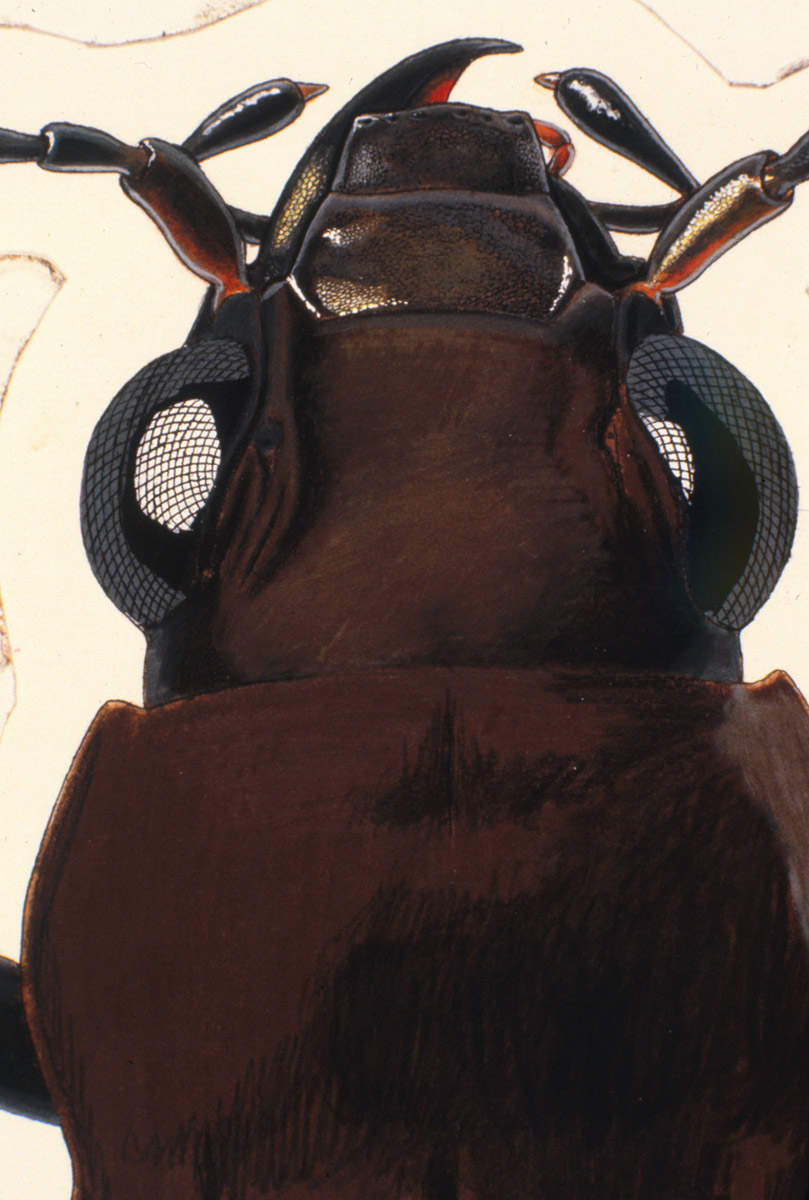
This crude pencil layer helps give a sense of the beetle, and as the layers of colored pencil are refined, each little bit has a more accurate context in which its color can be judged. Here is this area with a round of refinement of the colored pencil:
Refinement of colored pencil layer
Once the layer of colored pencil is in pretty good shape, I start working on smoothing out the pencil in small areas, and applying a layer of Pelikan inks (mostly white and black) on top of the colored pencil. The inks give much better highlights, and really make the drawing pop out into three dimensions. I use paint brushes and crowquill pens for the ink.
First layers of ink for highlights and darkest areas on the mouthparts and part of the antennae
The ink can be painted on in larger areas, and then scraped off with either a metal implement or a sharpened pencil. This can be seen in how the eyes progressed. Here they are with an ink layer before scratching:

Ink layer ready to be scratched
And here they are after the first scratches:
First scratches of ink on eyes
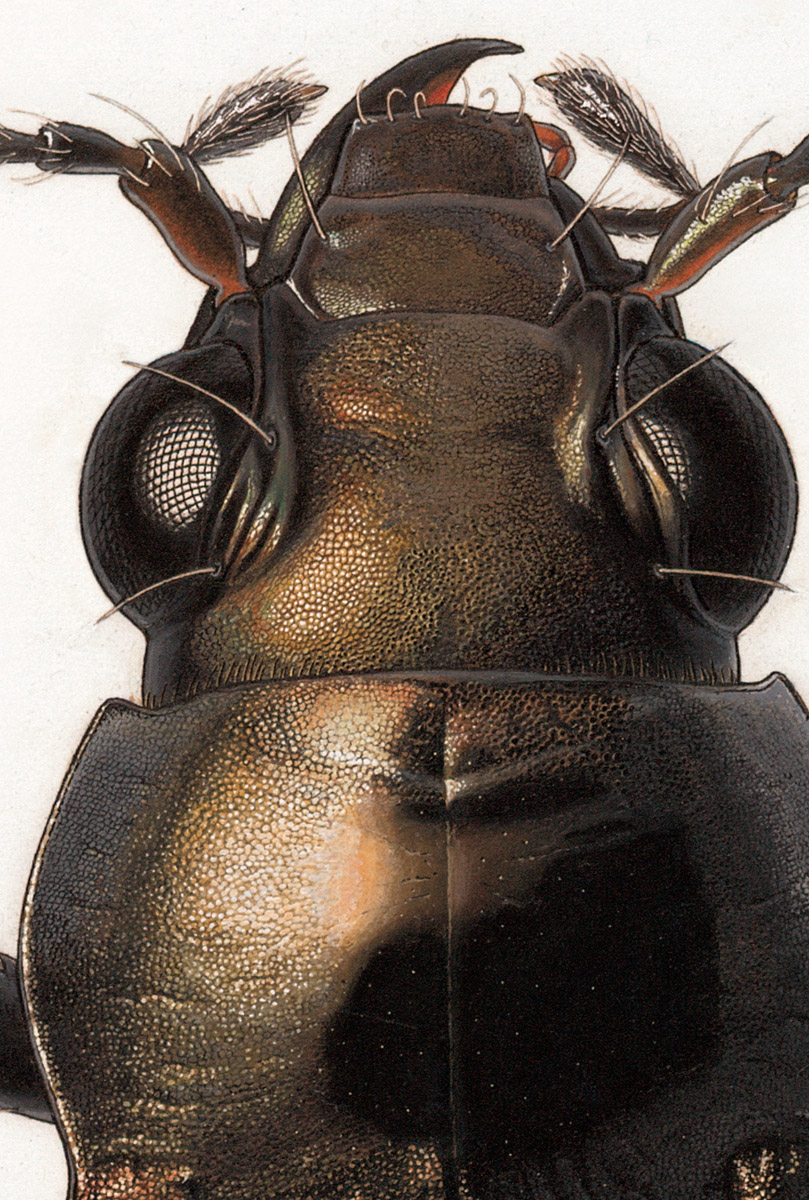
The scratched surface can be further refined by gently using softer pencil crayon on it (such as a darker gray for shading), but one must be careful as the ink might be scratched off rather than colored. Some colored pencils will be to hard to use for this purpose. In addition to coloring the ink with pencil, one can also use watercolors on the ink to color it, as was done here for the main body of the head:

Head is almost done (setae are needed, and ink layer needs refinement in a few places); prothorax still needs ink.
The head above is almost done. With similar work on the rest of the body, and the addition of setae (using inks and crowquill pens), the drawing is complete:
Completed drawing, with mask removed.
There are many more details I could mention, and I may provide more details in a future post.
This drawing took about 100 hours to complete. If you would like to see the progression of my most recent full-color drawing, from 2006, I have recorded some parts of its development here. This shows more general overview images of the progression of a drawing of Dicaelus purpuratus, and includes some things not pictured here (such as the use of home-made graphite paper), but doesn’t show the progression in closeup detail.


How clever that you kept a record of the progress way back when! I’ve never seen this before. Very cool.
I was just waiting for the day, 32 years later, when I could post those pictures on a blog!
Of course you were! For that exact purpose.
(I just discovered that I get notifications when you respond to my comments…)
thanks so much for posting this – as somebody who works with ground beetles and sometimes gets captivated by their hues and textures, I’ve wondered about drawing them, so it’s great to have the step by step instructions.
You are welcome! Have fun with drawing them.
David
I have found a master! Thanks for the details!
Thank you! And you are welcome!
You are an amazing illustrator! I am very interested in both science illustration and insects (especially Carabids), so I really enjoyed this. I am planning on taking your course in scientific illustration this winter as well, and I am looking forward to it. Thank you for the awesome post.
Thank you, Tobias! And you are welcome.
Pingback: Development of the Dicaelus purpuratus drawing | The Subulate Palpomere